Sowing in pots
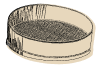
Pots are small containers about 6 cm wide and high. They are suitable for growing under cover. What are the specific features of sowing in pots? Earlier crops! Sowing in pots under cover can begin in February. The warmth provided to the plants will encourage them to germinate earlier. Flowering and harvests of indoor seedlings will thus be a few weeks earlier than seeds sown directly in the ground. No transplanting! Sowing in pots avoids the intermediate transplanting operation which stresses the seedling. During planting, the entire root ball is extracted and the root system is preserved. Less risk of spreading disease. The size of the pots imposes a certain distance between the seedlings and promotes air circulation. Pathogens (fungi, bacteria, viruses) will have more difficulty spreading from pot to pot. More space. Pots take up a lot of space and require organization. Remember to label and group together pots of the same species! They dry out more quickly. The smaller the container, the faster the humidity decreases. You will need to monitor the seedlings carefully to ensure they do not lack water. What to sow in a pot? The pot sowing technique is mainly used for large seeds and plants with deep taproots such as nasturtiums, sunflowers, peas, zucchini, melons and other cucurbits. This method is also recommended for fast-growing species that are sensitive to transplanting (sweet peas) or for plants for which you only want to have a few plants: tomatoes, eggplants, peppers, chilies, perennials... Pot sowing technique Small plastic pots are sold, but you can reuse yogurt pots or other recycled materials as pots. This will give them a second life before recycling them! Just make sure to clean them to limit the appearance of disease and pierce them to promote drainage. Newspaper is a biodegradable material that is perfectly suitable for sowing! The composition of the ink has evolved considerably in recent years and is now tending towards a composition based on vegetable oils. Chlorine is no longer used in bleaching paper; printers now use hydrogen peroxide, a non-polluting product. To make cups, choose papers without colored inks, as they still contain heavy metals. Fill the cups with a seed-starting substrate. Whether you buy it commercially or make it yourself, the choice of seed-starting substrate is crucial because the germination rate will depend on its quality! The seed-starting substrate must be light, fine, draining, and healthy. Dig a hole using a pencil. Do not bury the seeds too deeply. Generally, a depth of 2 to 3 times their diameter is sufficient. Place 2 to 3 seeds and cover with potting soil. Water the pots without completely soaking the soil, the substrate would be too compact and the seeds will not appreciate too high a humidity level. Use a fine watering can or soak the pots by letting the potting soil soak through by capillary action. Let them drain completely. Cover the pots with a glass lid, transparent plastic or under a mini greenhouse to increase the temperature, maintain humid conditions and stimulate germination. Place them in the light and near a heat source. When the seedlings have emerged, remove the lid or plastic. Make sure they have enough light so that they do not stretch. Hardening off When the frosts have passed, and the humidity and temperature conditions are favorable, the seedlings can be planted in the ground, generally about a month after sowing. But before planting, a hardening-off phase will be necessary. The transition from a warm, protected environment to one with significant temperature fluctuations would be difficult for the plant to bear. Gradually lower the temperature, then take the pots outside during the day and bring them back in at night to accustom the plant to its new environment.